Comparing Racial Passives

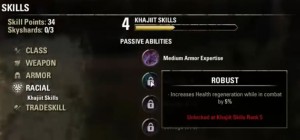
Racial passive skills guideIn The Elder Scrolls Online every race has its own skill line. Each of the 10 races has 4 different passive abilities: the first one is automatically unlocked and gives you a bonus on experience gained with a specific weapon or armor skill line (mostly useless), and in the other three abilities you can allocate up to three skill points.

While racial bonuses in general don’t provide any overly substantial benefit to your class or build, those of you who want to maximize the effectiveness of your character will surely be interested to pick the right race to go with your class and build.

Below we’ll provide a list of all racial passive skills and give you a basic overview of them. If you want to easily compare racial passives and find out which race is the most optimal for your build keep on scrolling, or click one of the convenient links below to jump to a particular section!

Comparison Table

The table below should give you the necessary info at a glance. Do note that simply because a race is low rated for a particular playstyle it doesn’t mean you can’t play it! The table only provides a visual representation of which builds and roles particular racial bonuses are beneficial for. If you truly don’t care about squeezing every last bit of power on your character then just ignore it all and pick whatever race appeals to you, either by visuals or their background story.

In endgame some of these bonuses have very little impact, but some can be extremely beneficial as well. Enchants, traits, mundus stones and other ways to buff your character have a substantially larger impact, but racial passives can still make a difference for players looking to do harder endgame content such as Trials.

  Tank Healer Magicka DPS
Stamina DPS
Breton

 ★★★☆☆ 

 ★★★★★ 

 ★★★★☆ 

 ☆☆☆☆☆ 

Orc

 ★★★★☆ 

 ★☆☆☆☆ 

 ★☆☆☆☆ 

 ★★★★★ 

Redguard

 ★★★★★ 

 ★☆☆☆☆ 

 ☆☆☆☆☆ 

 ★★★★★ 

High Elf

 ★★☆☆☆ 

 ★★★★★ 

 ★★★★★ 

 ★☆☆☆☆ 

Wood Elf

 ★★★☆☆ 

 ☆☆☆☆☆ 

 ☆☆☆☆☆ 

 ★★★★☆ 

Khajiit

 ★★★☆☆ 

 ★★★☆☆ 

 ★★★★☆ 

 ★★★★☆ 

Argonian

 ★★★☆☆ 

 ★★★★★ 

 ★★★☆☆ 

 ★★★☆☆ 

Dark Elf

 ★★★☆☆ 

 ★★★★☆ 

 ★★★★★ 

 ★★★★★ 

Nord

 ★★★★★ 

 ★★★☆☆ 

 ★☆☆☆☆ 

 ★★☆☆☆ 

Imperial

 ★★★★★ 

 ★★★☆☆ 

 ★★★☆☆ 

 ★★★★★ 

(download table as image)

Daggerfall Covenant

BretonBreton

  1. Opportunist – increased experience gain with Light Armor skill line by 15% and Alliance Points gained by 1%
  2. Gift of Magnus – increases max magicka by 2000
  3. Spell Resistance – increases spell resistance by 2310 and Magicka Recovery by 100
  4. Magicka Mastery – reduces the magicka cost of spells by 7%

Bretons are clearly most suited as spellcasters. While bonus experience on Light Armor has practically no benefit, increased AP gain can be helpful if all you do is PvP. Spell resistances are equally helpful for any playstyle or role, while magicka recovery will clearly mostly help healers and mages.

The main reason why I consider Bretons to be the best healers is their Magicka Mastery passive, reducing the cost of all magicka-based abilities by a whooping 7%. Magicka cost reduction is very difficult to get otherwise, and can help with managing your magicka substantially.
OrcOrc

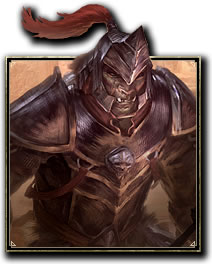
  1. Craftsman – increases XP gain with Heavy Armor skill line by 15% and crafting inspiration gain by 10%.
  2. Brawny – increases max stamina by 2000.
  3. Unflinching Rage – grants 1000 max health and heals you for up to 600 whenever you deal damage with your weapon (4 second cooldown).
  4. Swift Warrior – Increases weapon damage by 258, reduces sprint cost by 12% and increase sprint speed by 10%

Crafting inspiration can be beneficial if you’re creating a crafting alt, but is otherwise not necessary. Max health and stamina makes Orcs ideal for sturdy melee characters, and very beneficial weapon damage solidifies them for stamina-based builds.
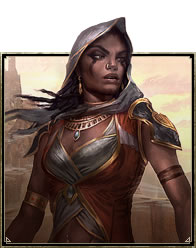
RedguardRedguard

  1. Shield Affinity – Increases experience gained with the One-Handed and Shield skill line by 15%, and increases duration of eaten food by 15 minutes.
  2. Martial Training – Reduces the cost of weapon abilities by 8%.
  3. Conditioning – Increases maximum stamina by 2000.
  4. Adrenaline Rush – Restores 950 Stamina when you damage an enemy with a melee attack once every 5 seconds

Redguard’s reduced weapon ability costs, increased stamina and stamina restoration make them ideal for stamina-based DPS but also tanks. Tanks do need quite a lot of stamina to be able to consistently block and interrupt during combat, and Redguards are one of the races which have the most impactful benefits.

The Aldmeri Dominion
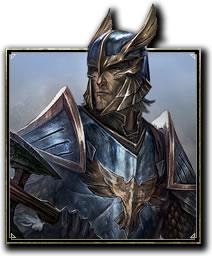
High ElfHigh Elf

  1. Destruction Talent – Increases XP gain with Destruction Staff skill line by 15% and character experience gained by 1%.
  2. Spell Recharge – Reduces damage taken by 5% while casting or channeling an ability, and restores 645 stamina or magicka after activating a class ability (once every 6 seconds).
  3. Syrabane’s Boon – Increases max magicka by 2000.
  4. Elemental Talent – Increases Spell Damage by 258.

High Elves (Altmer) are clearly best suited for the Sorcerer class, or other magicka-based damage dealing builds. Destroying your enemies with ranged spells becomes easier with their huge magicka bonuses, and the last passive is clearly only useful for magicka builds.
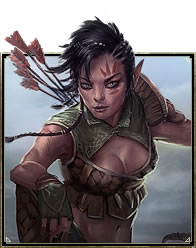
Wood ElfWood Elf

  1. Acrobat – Increases experience gain with the Bow skill line by 15%, and decreases fall damage taken by 10%.
  2. Y’ffre’s Endurance – Increases stamina recovery by 258.
  3. Resist Affliction – increases poison resistance by 2310 and gain immunity to poisoned effect. Also increases maximum stamina by 2000.
  4. Hunter’s Eye – Increases detection radius in Stealth by 3m, and gain 10% movement speed and 1500 bonus to Physical and Spell Penetration for 6 seconds after using roll dodge.

Poison resistance is not as impactful as you might think, so the only tangible benefit from Resist Affliction is the larger stamina pool bonus. 258 stamina recovery is huge for stamina-based builds, but is the entire Wood Elf (Bosmer) race’s potential is negated with Hunter’s Eye useless bonuses.

For melee DPS or bow builds, there are races with more impactful bonuses.
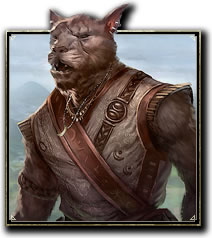
KhajiitKhajiit

  1. Medium Armor Expertise – Increases experience gained with Medium Armor skill line by 15%, and increases chance to Pickpocket by 5%.
  2. Robustness – Increases health recovery by 100, and stamina and magicka recovery by 85.
  3. Lunar Blessings – Increases max health, magicka and stamina by 825.
  4. Carnage – Increases critical hit damage and healing by 10%, and reduces detection radius in stealth by 3m.

Khajiit are clearly intended to be sneaky thieves, however in my opinion their passives give a little bit of everything, making them sub-par for stamina builds. Tanks might benefit most from increases to all three main stats, but there are other races better suited for tanks or stamina DPS builds.

The Ebonheart Pact
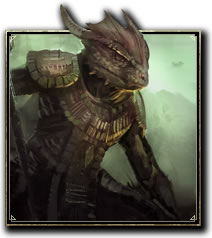
ArgoniansArgonian

  1. Restoration Expertise – Increases XP gain with Restoration skill line by 15%, and swimming speed by 50%.
  2. Resourceful – Increases max magicka by 1000, and restores 4000 Health, Magicka and Stamina whenever you drink a potion.
  3. Argonian’s Resistance – Gain immunity to diseased status effect, increases Poison and Disease resistances by 2310, and increased max health by 1000.
  4. Life Mender – Increases healing done by 6%.

Argonian passives were clearly designed with healers in mind, and they excel at this role. However, there are other races which can be equally good for healers, and have more varied bonuses in case you want to switch it up a little. I would only recommend Argonian healers if you intend to do endgame raids.
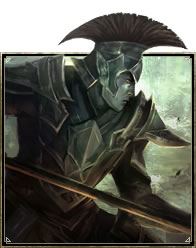
Dark ElvesDark Elf

  1. Ambidexterity – increases XP gain with Dual Wield skill line by 15%, and damage taken from environmental lava by 50%.
  2. Dynamic – Increases maximum magicka and stamina by 1875.
  3. Resist Flame – Increases fire resistance by 2310 and grants immunity to burning status effect. Also increases maximum health by 600.
  4. Ruination – Increases your Weapon and Spell damage by 258.

Dark Elves (Dunmer) make for excellent damage dealers with both stamina and magicka builds. Fire resistance bonuses can be helpful for frequent dungeon-dwellers but especially Vampires, while the minor health bonus is good for everyone. A decent amount of both magicka and stamina provided by Dynamic passive is excellent regardless of your build choice.

Ruination passive has both Weapon and Spell damage bonuses, solidifying Dunmer race as a clear-cut damage dealer.
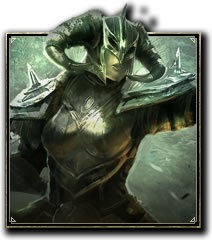
NordsNord

  1. Reveler – Increases experience gain with Two-Handed Weapon skill line 15% faster, and duration of any consumed drink by 15%.
  2. Stalwart – Increases max stamina by 1500, and you gain 5 Ultimate each time you take damage (once every 10 seconds).
  3. Resist Frost – Increases cold resistance by 2310, gain immunity to the Chilled status effect, and increases maximum health by 1000.
  4. Rugged – Increases your Physical and Spell resistances by 3960.

Nords are clearly aimed for tanking builds, and they certainly excel at that. Increased health, stamina and resistances are all very useful stats for a fully fledged tank, and Nords are definitely one of the best choices for that role.

ImperialImperial

  1. Diplomat – Increases experience gained with One-handed and Shield skill line by 15%, and gold gained by 1%.
  2. Tough – Increases max health by 2000.
  3. Imperial Mettle – Increases max stamina by 2000.
  4. Red Diamond – Melee attacks restore 333 health, magicka and stamina once every 5 seconds. Also reduces cost of all abilities by 3%.

The Imperial race is available if you pre-ordered ESO or purchased the Imperial Pack in the Crown Store, and they passives are very strong for tanks and melee DPS builds. The increased max health and stamina is very useful for both aforementioned builds, as is the resource restore on attacks.


Once again, the first passive bonus for every race (increased experience with skill line) is automatically unlocked at level 1 and you can’t allocate any additional points into it. It’s also the least impactful bonus, as you will eventually level up all weapon and armor skills anyway.

The other 3 passive bonuses each have 3 ranks/levels. The passives can’t be immediately unlocked, but will eventually become unlockable as you level up and gain more experience in your racial skill line. First unlockable passive ability is available when your race skill line is Rank 5 (about the time your character is level 5), the second is available at rank 10 and third at rank 25.

You can further upgrade a particular passive to level 2 and 3 for every 10 ranks in your racial skill line. Note that all the bonuses mentioned above are for max rank passives.

Any race in any alliance

You can purchase a Crown Store item which enables you to play any race in any alliance. Normally each of the three alliances has only three races available, but by purchasing the pack you can create any race in any alliance without restrictions.

Imperial upgrade, allowing you to play Imperial race, is purchased separately.

Create the perfect character

Racial bonuses are just one of many ways you can customize and get the most out of your character. Learn about gear choices, enchants, traits, weapon skills, class builds, spell rotations, and dozens of other game mechanics and secret tips you simply must know.

Read Complete ESO Strategy Guide Here »

We do hope the comparison of racial bonuses was useful and will help make your race decision easier. If you have any comments, questions or suggestions be sure to voice them below!

Posted in Game Info, Guides | Tagged , , , | 27 Comments

Beginners Leveling Guide & Tips

Leveling Guide & TipsOne of the most important things for players in any MMORPG is of course leveling. Getting your characters to endgame and experiencing the game as fast as possible is one of the main goals of many. Not everyone can dedicate hours and hours to play games every day so maximizing your farming time is always on the top of everyone’s list.

This guide won’t focus on specific quest walkthroughs and hold your hand when leveling: if that’s your thing you can check out Killerguide. Our beginners guide will show you some general basics of leveling quickly in The Elder Scrolls Online and provide you with some tips and tricks that can improve your experience gain.

Contents:

  1. Go explore
  2. Race and class choices
  3. Builds
  4. Using weapon swap
  5. Starting areas
  6. Skipping quests
  7. Skyshards
  8. Mounts
  9. Gathering crafting materials
  10. Crafting
  11. Looting
  12. Quest levels
  13. Dungeons
  14. PvP

Go explore

First thing you should know is that rushing to endgame in TESO isn’t as appealing as it may be in other games. Elder Scrolls Online is designed in a way where exploring the gigantic world of Tamriel and discovering things slowly is preferred and even encouraged. That being said, there are of course benefits to leveling fast: you gain access to more skill points and thus more spells, better equipment, and of course higher level dungeons. More challenging content usually means better rewards, and the ones who get there early will profit the most.

Leveling fast is especially important if you’re part of a guild that aims to seriously compete in Cyrodiil and AvA battles. You can join PvP as early as level 10 and your character attributes will be equalized with higher level players, but having better equipment and access to higher level and typically better abilities can have a significant impact on your success. Being successful in PvP has numerous benefits in itself and it’s yet another reason why you’d want to level up your character faster.

So my first advice would be to take it slow and discover things yourself unless you’re a hardcore player who intends to be the first to do endgame dungeons, crafting or PvP. Exploration is one of the key points of ESO so go out there and enjoy the game.

Race and class choices

Race and class choicesDifferent races have different benefits, and not all classes and builds level at the same speed. Even if you intend to primarily be a healer later on, leveling up with a majority of your skill points spent into healing abilities will cause you some trouble, especially if you’re mostly tackling content by your lonesome. Fortunately you have access to more than plenty of skill points at later stages of the game, so don’t be afraid to spend more than a few into damage-dealing abilities, especially early on. You should have at least 3 spells focused on dealing damage for leveling — most of which should also be morphed for additional effects.

If you’re for example a Templar, even one healing spell should be more than enough to top off your health when you find yourself in trouble. Most class or weapon skill trees have access to some self-sustain abilities so take advantage of those! If your build lacks in the defense or sustain department (for example, Sorcerer class), then using abilities with strong CC is advised. Generally for leveling you should ensure you have plenty of damage to be able to take down monsters as quickly as possible.

Builds

Prepare your build in advance. Don’t spend minutes or even longer in the middle of nowhere thinking which spell your next skill point should be allocated to. Spend an hour or two if you must taking a close look at your skill trees and plan about 5 levels in advance. Write down the skills or morphs you intend to take and stick to it. Stopping in the middle of a quest or recalling back to a wayshrine to ponder over numerous choices you have will take more time than planning ahead.

Also consider taking some group-utility abilities like crowd control or heals once you’re level 15 or so. You will start doing dungeons soon enough and a couple of attribute and skill points spent into extra magicka and healing spells could enable you to find a group more easily.

Using weapon swap

Weapon swap becomes available to all characters at level 15. It allows the use of two sets of weapons which can be switched back and forth during combat. What this allows you to do is have one damage-dealing build aimed at leveling, while your alternate build can be more specific such as healing when in groups.

As an example equipping a Restoration Staff as your alternate weapon and spending just a few skill points into the Restoration Staff weapon skill line can make a decent healer out of almost anyone! The best thing about weapon swaps is that the abilities on your action bar also get switched, essentially enabling you to easily switch between two builds as you please, even in combat.

Starting areas

Starting Zone: Bal Foyen

Bal Foyen is visually my favorite area.

Depending on your choice of Alliance (faction) your character will start in a different area. With three alliances there are also three different starting areas, and not all of them are equal in terms of quests nor graphical setting. We have another guide up which covers starting zones in more (visual) detail, but we’ll take a short look at the first few zones for every faction regardless.

First off all characters regardless of faction or class start in Coldharbour — it’s sort of a tutorial area that takes only about 10-15 minutes of gameplay to complete. Once you’re done with it you’ll be moving to the following areas:

  • Daggerfall Covenant – the first area is Stros M’kai, a forest area. After a couple of hours there you’ll move on to Betnikh and then Glenumbra.
  • Ebonheart Pact – first zone you find yourself in is Bleakrock, which is a snow-covered area much like most of Skyrim. The second and third zones are Bal Foyen and Stonefalls, both fantasy, forest-like areas.
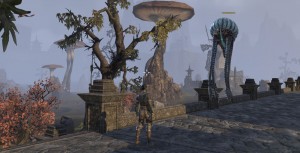
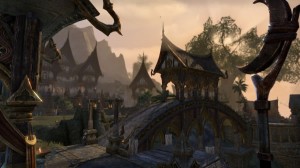
  • Aldmeri Dominion – you start in Khenarthi’s Roost, a tropical setting which I especially like at night. After you’re done you’ll be moving to Auridon, a sizeable area that basically looks like an elven forest.
Town of Mistral in Auridon

Town of Mistral (Aldmeri Dominion)

Generally while it doesn’t really matter in which area you start it may impact your early game experience. For example I for the most part dislike snowy Skyrim-like Bleakrock and I tend to rush through it as fast as I can, so despite me hating the area I typically go through it the fastest just because I want to get to the next zone quickly.

As I said it’s really not important which zone you start in, but it may impact your leveling speed. My suggestion though is to pick an area that you’ll feel most comfortable playing in, and take your time learning the game’s basics at least early on. Rushing through the first area and skipping a quest or two may not hurt you in the long run, but spending an extra hour shouldn’t be overly important either.

See also: ESO Zone Levels.

In endgame you will go through all faction’s starting areas, so eventually you will see all of these zones anyway.

Skipping quests

You don’t have to do all quests you come across, but for the most part you’ll want to complete them rather than grinding monsters. Questing and exploration overall awards you more experience than actually killing stuff, and you’ll also often be getting decent items and gold a rewards. Main quests also often award you with skill points and pretty sweet loot so you may want to complete them before any side quests.

If you can use a disguise and skip monsters in a particular quest area you should do so. Killing mobs takes time and isn’t as rewarding as completing the actual quest is, and even with a disguise you’ll far too often have to kill enemies anyway. Even if you do intend to move on from an area, be sure to fully discover it first: don’t underestimate the experience you gain from exploration. ESO was designed for questing and exploration in mind and you are rewarded for it so my recommendation is to complete all quests, public and group dungeons in an area before moving on. If you don’t, you might find yourself a couple of levels behind monsters which will make it more difficult to kill them and progress further.

That being said, if you think you completed all quests in a particular zone, chances are you’re wrong. Go out there and explore everything, you’ll often find more quests to help you gain another level before you move on.

Skyshards

Collecting a Skyshard

Grabbing every skyshard you find is a great way to get extra skill points.

Throughout Tamriel there are plenty of Skyshards, which is yet another reason why you should go out and explore the world. You’ll be introduced to skyshards in the early tutorial, but just to remind you they are basically objects you find in the world and interact with. Once you find three skyshards you will gain 1 skill point, so it’s extremely beneficial to find as many as you can.

Tutorial area (Coldharbour) has 1 sky shard, and the next couple of zones for every faction each have 3 shards you can find. Later on zones in the game will contain whooping 16 skyshards, and all group dungeons have one inside as well. In Cyrodiil you can find a total of 45 skyshards. Since skill points are so important to your character strength and development you should do your best to find as many as you can. Eventually, you’ll want to go back to any you missed anyway, in which case be sure to refer to our maps to easily find them.

Mounts

If you preordered the game a mount is really inexpensive to obtain. For everyone else though scraping together 17,200 gold can be quite the task. If you don’t have the Imperial horse from preordering the game then you will level up slower than some other players, and it will take quite awhile to gather enough gold to purchase one.

As with any MMORPG your gold gain increases over time, so don’t try and farm that much gold on low levels. If you’re doing particularly well you might be able to purchase one at around level 20, but until then don’t sweat it and just walk to wherever you need to go. We have a dedicated guide on mounts up here so be sure to check it out for more information.

Gathering crafting materials

Collecting Crafting Materials

If you find any crafting materials be sure to collect them, but don’t overdo it.

You will very often come across crafting nodes in the world that can be gathered. In starting areas Jute, Iron Ore and various Runes and herbs are frequently found and helpful to pick up. While you probably won’t immediately delve into crafting, you might find yourself without the necessary resources and ingredients later on so if it doesn’t take you too far from your path be sure to pick up any ore, wood, plants, runes, or other crafting materials you see.

Hoarding a ton of crafting mats though might not be as useful or profitable as you might think so don’t overdo it. Most useful materials you can find are probably runes, as they enable you to enchant items for additional stats. Crafting various weapons and armor while helpful does take time and resources that might be better spend on gaining character experience.

Crafting

Crafts are a significant part of the game and can be very helpful if you know what you’re doing. As mentioned above gathering various materials can be time consuming, but possibly not as much as doing it later on. If you absolutely enjoy crafting then go for it, but if power leveling your character is your goal then don’t overdo it. You can make some useful items for yourself while leveling, but without significant time invested into researching and extracting it will be difficult to create something highly useful.

For the most part items you get from quests, find in chests, and especially those from group dungeons will be more than enough to get you through the game. Once you’re sufficiently high level and can invest skill points into various crafting skill lines you may be able to create decent items to replace your worst gear, but other than that don’t expect much. In endgame items created with crafting are quite amazing though, so keep that in mind. For more information on crafting be sure to check out this article.

Looting

Your character inventory is limited, so picking up every trash item you find, various food ingredients or fishing baits will just clutter it. Very few items can be sold for any substantial amount of gold early on in the game, and there’s even less ways to spend it. If a particular weapon or armor you find it not an upgrade for you then just leave it (unless you’re keeping it for extraction or research, aka crafting). Sometimes I spend even a couple of hours doing quests and not coming across a vendor, so stopping constantly and destroying items to make room for more useful ones is essentially a waste of time.

You should pick up basic crafting materials, potions or equipment you intend to use, but leave most other stuff. When you kill enemies just take a quick glance at what they dropped, take what you need and move on. Thinking about whether you should pick up that weapon and vendor it for 30 gold is already time wasted! Even though it does technically save you time, having “Auto Loot” on isn’t recommended since you’ll end up with a ton of trash.

As a sidenote, you start with 60 item slots for your inventory. The first upgrade adds 10 slots and costs 400 gold. Upgrades are available at bankers in major towns of any area (look for the “bag” icon on town’s map), and it’s your number one priority for spending gold. You can read a more detailed article on character inventory here, explaining how to best manage and increase your bank and character inventory slots.

Quest levels

Quest LevelsParticularly important after the third area and later, you should always check the quest’s recommended level. If a quest is level 12 and you’re only level 9, you might want to do some easier ones first. As a general rule of thumb quests you obtain from Mages, Fighters or especially Undaunted guilds are higher level and tougher than the random ones you find in the same zone. You can see a quest level in your Journal (“J” hotkey), and they’re also color-coded.

Walking (or riding) to a quest for 5 minutes only to find out you can’t quite kill the pesky boss is not only annoying but also a waste of time. Public dungeons can take quite a long time to complete on your own, so do your best to group up with others to make it faster. Do easier quests first, and try to focus on completing most if not all quests in a specific part of the zone in the same time so you don’t have to walk back and forth multiple times. An additional tip, if you’re near a Wayshrine you should take the time to go and activate it. It’s the fastest way to travel through a zone, and even early on very inexpensive.

Another tip: traveling to a waypoint from another waypoint (as opposed to recalling from random places in the world) doesn’t cost you any gold. Even though it’s not very expensive it can add up after awhile, and that gold can be better spent to upgrade your inventory or bank space.

Group Dungeons

You should not skip group dungeons! They are generally easy to complete as long as you have a fairly competent group, but make sure you have a dedicated healer and tank, it does help a great deal. Dungeons are a great way to get some additional experience and equipment, as well as learn more about the group mechanics in The Elder Scrolls Online which will benefit you in the long run.

First dungeons are aimed for levels 12-15, and depending on your Alliance the first you’ll come across will be:

  • Ebonheart – Fungal Grotto (in Stonefalls)
  • Aldmeri – Banished Cells (in Auridon)
  • Daggerfall – Spindleclutch (in Glenumbra)

Unless you have a group ready to go you should enter the instances when you’re almost done with all other quests in the particular area, since the extra few levels can help greatly. As previously mentioned, before you go to your first dungeon try to learn (or morph) a heal, taunt or CC (depending on your build of course) spell so you have some additional group utility. Also see if there’s an Ultimate you could learn that would benefit your group more, or be more powerful if someone used synergy from it. It’s also helpful to get to level 15 before you enter your first dungeons since you’ll be able to use weapon swap at that point. If you need additional skill points head on to our maps page and find the skyshards you missed!

Unfortunately unlike most other content you can do in TESO dungeons give an underwhelming amount of experience, so if leveling quickly is your goal you might not want to repeat each dungeon more than once. Still, they are fun encounters you should definitely check out. We have a more comprehensive guide for dungeons here, so make sure you read it!

PvP

Leveling entirely in Cyrodiil isn’t impossible, but it’s far from the most optimal way to gain experience. You can join Cyrodiil at level 10, and your character’s base attributes will be increased to somewhat enable you to stay relevant among higher level players. Nevertheless the experience gains in PvP combat are far lower than in PvE content, so even those of you who are solely interested in player versus player battles will want to at the very least complete the main quest line in every zone.

Exploration, public and group dungeons, and questing in general are all more efficient for fast leveling in Elder Scrolls Online, and also give you access to more skyshards and skill points to improve your abilities. Don’t skip PvP because it’s a fun and worthwhile experience, but don’t expect to level up solely in Cyrodiil.


You can get more detailed zone overviews and quest walkthroughs from Killerguide, but I still hope my tips and tricks are at least a bit helpful. I’d love to hear your own experiences and leveling tips so be sure to post them in the comments below.

Posted in Game Info, Guides | Tagged , , , , , , , , , , , , , | 4 Comments

Beginners Guide to Combat Mechanics

Combat in The Elder Scrolls OnlineIn many ways The Elder Scrolls Online doesn’t attempt to revolutionize MMORPG genre, which is a good thing. The character progression and leveling was in many ways already proven to work in other games, and TESO doesn’t stray too far from the basics.

Combat system is also nothing groundbreaking either, and players who have experience with previous Elder Scrolls games will feel right at home. That being said, ESO does feature a few unique systems and mechanics that make combat more dynamic and interesting, and this beginners combat guide will take a basic look at some of them.

Contents:

  1. Combat skills and action bar
  2. Targeting
  3. Swapping weapons
  4. Block
  5. Dodge
  6. Stealth
  7. Synergy
  8. Finesse
  9. PvE combat

Combat skills and action bar

Every character has a skill bar with six slots for abilities. It may seem like you’re severely limited in that choice but you can change your active spells depending on your needs, and even use two sets of spells with weapon swap.

You can place up to five different abilities on your action bar at any given time. You can combine them from your class, weapon, armor, guild or other skill trees and get the right combo to suit your purposes. Most skills will of course only work if you have the right weapon equipped so make sure you plan ahead and don’t intend to switch back and forth between different weapons early on in the game. By using a particular weapon for awhile you gain mastery in that specific weapon and can improve your skills in that weapon by spending skill points.

The last (6th) slot on your hotkey bar is reserved for your ultimate ability, which is unlocked eventually by using spells in a particular skill line. These are extremely powerful abilities which can’t be cast constantly during combat as they can have dramatic effects, and your first ultimate spell should be available at around character level 6. Choosing the right ultimate ability is often all about synergy with your other spells. Weapon and armor skill lines don’t have any ultimate spells, instead they come from your class, guild or world skill lines.

Additionally, by using a particular type of armor (heavy, light or medium) you can advance in corresponding skill lines as well. Spending skill points into a specific armor type can give you a variety of bonuses, such as increased damage or healing, or a cost reduction when using certain spells. Weapon skill lines have plenty of different active and passive abilities, but armor skill lines have one active ability each and several passive ones.

Passive abilities don’t need to be slotted to your action bar. Assuming you spent a skill point into one it’ll be always active if its requirements are met (having skill points into Heavy Armor passives while not actually wearing any Heavy Armor will of course not provide you any benefit).

For a more detailed overview of skill points and skill lines see our article about character leveling and progression. It will help you get a better grasp of its basics.

Targeting

TESO uses a so-called soft-lock targeting system, meaning you have to select an enemy to attack it (tab targeting). However you still have to aim your attack towards the enemy, the targeting is mainly used to focus which enemy you want to attack in a group of enemies.

Attacking an enemy with a bow for example does require you to aim precisely, however unlike in Skyrim if enemies move to the side slightly your arrows will still lock onto them. That being said, you can’t simply click your mouse on your target and cast spells in any direction to hit them — you need to be facing your target, especially if you’re casting single-target spells among multiple enemies.

Swapping Weapons

The Elder Scrolls Online allows you to switch weapon sets mid-combat, for example you can switch between a bow and a 2H weapon in the middle of the fight. Swapping weapons will also switch the abilities and spells on your action bar, allowing you to better adapt to various combat situations.

We previously mentioned you are somewhat limited in ability choices by the size of the action bar, but weapon swap enables you to practically double your available abilities. Adding or changing abilities on your action bar can only be done outside of combat. Weapon Swap is available once your character reaches level 15.

It’s worth noting that unlike in Skyrim spells do NOT need to be “equipped” to your hand, meaning you can wield a two-handed weapon and still cast spells in the same time.

Block

Blocking attacks is available to all characters and classes, and requires stamina to be used. Blocking an attack can completely negate its damage, but also cause your enemy to temporarily lose balance and be attacked freely and exploited for additional damage. Blocking isn’t just for shield users as you might expect, as veteran Elder Scrolls players are surely aware; you can block even with your 2H weapon or when dual wielding. Blocking is done by right-clicking while an enemy is preparing to attack you.

You won’t be blocking constantly but some charged attacks are important to block since it reduces their damage significantly or completely, so you should get accustomed to using this mechanic quickly and frequently. It’s especially important in dungeons where tanks can’t always keep aggro, and even if you’re standing way back and casting spells monsters will come and attack you, and you don’t want to only rely on your healer to keep you alive.

Dodge

Dodge allows you to move out of an attack by double-tapping directional keys. Same as with block, dodging also expends your stamina. Dodging attacks can be extremely beneficial, especially in groups, and has added benefits as well such as gaining additional finesse/ultimate points.

You can also dodge many spells coming towards you from monsters with the dodge mechanic. Some mini-bosses even early on in the game can be particularly nasty if you don’t evade their spells! It’s essentially just another tool in your arsenal of ways to keep yourself alive, and one which you should also use at all times.

Stealth

Sneaking is an integral part of previous The Elder Scrolls games and TESO made use of the system to further add variety to combat and play styles. Stealth allows you to sneak past enemies undetected, but does slowly drain your stamina. Stealth can be performed by any class, but Nightblades for example can get special bonuses from their class skill line, as can some races. The first attack from stealth also deals a guaranteed critical strike, making it a viable tactic for more challenging content or PvP.

Some enemies in PvE can also drop disguises when killed enabling you to equip them and move freely in hostile areas, however getting too close to enemies can make them aware of your presence. You will come across this very early into the game on certain quests. While these quests can typically easily be completed by simply killing everything in your path, with short respawn timers of monsters sometimes you just want to skip them and go for quest objectives, and disguises help a great deal with that. Wearing a disguise doesn’t unequip or replace your current armor.

Synergy

Synergy between some abilities and spells truly makes combat in Elder Scrolls Online feel unique. It’s especially important for groups of players to try and take advantage of synergy between their spells as it can cause devastating effects on enemies. An example of synergy is a spell “Nova”, an AoE attack that can be interacted by another ally and transformed into a “supernova”, boosting its damage significantly. Being active during combat and paying attention to your allies’ spells can be immensely helpful.

Players generally have to be in range of a spell and “activate” it to gain the synergy bonus or benefit. Nearly every skill line has one or more spells or attacks which have synergy, and all Ultimate skills have them. In groups you can rapidly accumulate finesse by using synergy with various abilities, and of course deal significant extra damage, crowd control or other effects.

Players aren’t the only ones taking advantage of the synergy system though, as NPCs can also make fights more interesting and challenging. As an example an enemy can throw tar on the ground, and another enemy can use a fire-based spell to ignite it. The full extent of this system is best seen in dungeons and higher level areas where monsters often complement each others abilities, thus always keeping you on your toes.

Finesse

Finesse is a great and rewarding system which encourages players to use their abilities properly. Finesse points are gained by successfully attacking, dodging, blocking or interrupting an enemy. Since ultimate abilities require finesse to be cast, performing the aforementioned combat actions will enable you to use ultimates more often. A secondary benefit of finesse is that you gain more experience and items from slain monsters.

In a group setting finesse and ultimate points can be acquired more quickly, so it’s important for every player to watch out for synergy and defensive moves.

PvE combat

Battling against NPCs and AI is designed in a way to mimic combat against players as much as possible. As such ranged monsters will often fan out or try to kite you, melee ones will protect ranged casters and similar. AI-controlled monsters are also smart enough to take advantage of synergy system as well, so at times they can be quite challenging as well.

Monsters more than often use empowered attacks or channel spells which you can easily interrupt or block, and it’s highly recommended to do so. Paying attention to your surroundings, evading and blocking attacks, interrupting opponents and properly chaining your spells and crowd control spells can easily help you beat almost any content in the game.


Overall the game follows the traditional combat style while also adding some unique elements and mechanics to it, making fights more unpredictable and in the end more fun. Having to think about synergy and actively encouraging players to perform successful blocks and interrupts adds a completely new dimension to combat that is more challenging and rewarding.

Click here to learn more about ESO’s mechanics and get tons of other advice, tips, tricks and strategies for any class!

What’s your favorite combat feature in Elder Scrolls Online? Do you like the current systems of finesse and synergy or do you prefer the simplistic nature of combat in other MMORPGs — tell us in the comments below!

Posted in Game Info, Guides | Tagged , , , , , , , , , , | 9 Comments

Leveling and Character Progression in TESO

Leveling and character progressionElder Scrolls fans are already used to the open-ended progression system of their characters from Oblivion and Skyrim, and The Elder Scrolls Online didn’t change too much in that regard. TESO allows you to pick from a multitude of choices to build your character exactly how you want. The number of skill choices is vast and players can master a variety of skills and talents, and given enough time you can master nearly all skills.
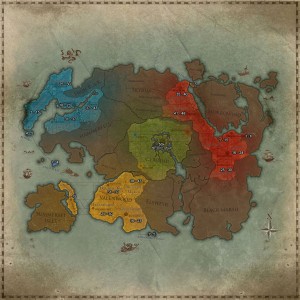
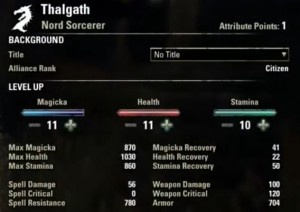
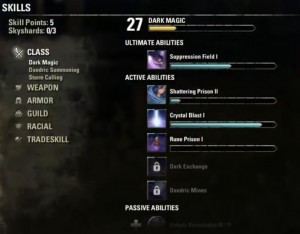
This guide outlines the basic ways how your character development looks in Elder Scrolls Online, and how you can use various ways to customize your character to fit your play style.

Contents:

  1. Leveling
  2. Attribute Points
  3. Skill Points
    1. Morphing Abilities
    2. Ultimate Abilities
    3. Passive Abilities
  4. Class and Race
  5. Veteran Ranks
  6. Generic Skills

Leveling

Map with zone levels

Map of Tamriel with approximate zone levels

The basic progression in ESO is of course leveling: killing monsters, completing quests, exploring the gigantic land of Tamriel, or even lockpicking gives you experience points, which eventually lead to a level up for your character. A traditional and tested system that works well in other MMORPGs is present in TESO as well so I’m sure you’re already familiar with it. By leveling your character gains access to skill points and attribute points, and each level gives you one point in each of these. Skill points can also be obtained throughout the world by finding “sky shards“.

The first starter islands (Bleakrock Isle, Khenarthi’s Roost and Stros M’kai) are aimed for levels 1-5. Second zones are 3-15, followed by 15-25, fourth area 25-35, then 35-40 and finally fifth map for levels 40-45. Around level 45 or so players typically head to Coldharbour for level 50. Once you finish the storyline for your own faction, you’ll move on to another faction’s zones and start gaining Veteran Ranks (also called 50+ content).

ESO Leveling Guide

Need a step by step leveling guide to take you to endgame in a week?

Read the guide »

Attribute Points

AttributesAttribute points are used to enhance your character’s basic resources: health, magicka and stamina. Each of these three has different benefits for your character and its build:

  • Health: typical health system as seen in other games — by taking damage in combat your health is drained, the more health you have the more durable you are.
  • Magicka: another standard system, magicka is used to cast spells.
  • Stamina: for those of you unfamiliar with previous Elder Scrolls games, stamina is used for sprinting, blocking, dodging and using weapon abilities.

There’s nothing too complex in these three base character attributes and you will mostly put your attribute points into whatever is best for your class, play style and character build. There is a system called “overcharge” in effect where placing all of your points into one attribute would yield reduced effects (basically, diminishing returns) so it’s often not a bad idea to mix it up. Attribute point can be respecced even separately from skill points, but it does cost a not so insignificant amount of gold.

It’s interesting to note that investing an AP into health grants you +15, while 1 point only gives 10+ to stamina or magicka. While having extra magicka early on for leveling is very beneficial, in endgame you will likely want to focus most of your attribute points into health (despite overcharge), and get stamina and magicka from items, racial passives and especially armor enchantments since they give the same bonus amount to all of these three resources.

Skill Points

Skill points are used on skillsSkill points allow you to further develop your character by specializing into certain spells. Each skill point unlocks a particular spell or ability, all of which are categorized under certain themed skill lines, such as Class, Weapon, Armor or Tradeskill. By simply using abilities in a skill line you unlock further abilities in the same skill line, so it’s important to think ahead and not neglect using any abilities you picked.

Overall you gain a whooping amount of around 300 skill points on level 50, essentially enabling you to max multiple different skill trees. There are respecs available but they are very costly, depending on how many skill points you have allocated.

Morphing abilities

Morphing abilitiesAfter using a particular spell for awhile (when it reaches rank 4) and gaining experience with it you can also choose to morph it, gaining further utility on them: as an example a Templar ability called Rushed Ceremony heals a nearby allied player, and when morphed it can either heal two additional allies or restore magicka when you cast it.

Choosing how to morph your ability can have a deeper impact as well, so for example if you’re a solo player you will probably want to use the latter morph on the aforementioned Rushed Ceremony spell, so you always need to take into account what you or your group might find more beneficial. You can only choose one morph, not both!

Ultimate abilities

By using spells and gaining experience in the same skill line you eventually gain access to ultimate abilities. They don’t cost any magicka or stamina to cast, but you can’t use them very often as they are recharged during combat. However they are some of the most powerful spells in the game and can have a significant impact in combat.

While you can have multiple ultimate abilities to choose from, you can only place one on your skill bar at any given time. Successfully performing certain actions during combat (such as dodging or blocking) gives you finesse which awards you with more experience and loot, but perhaps more importantly also enable you to use ultimate abilities more often.

Passive Abilities

Passive abilitiesAnother way to improve your existing skills and spells in by passive abilities. They have a lesser effect to your character but can be well worth it if you’re specialized into certain play style. For example you can spend a skill point on a passive ability that increases the damage of all your fire spells, or unlock an ability to passively regenerate health while in combat.

Various passive abilities are available in all skill lines, including class, racial, and others. Managing your skill points properly is very important and while TESO allows for a vast variety of character builds, lots of times it’s best to specialize into a certain game and play style. Fortunately the game allows you to build a character exactly as you like and doesn’t force you into any particular skill line. For the most part passive abilities only affect active spells in the same skill line, but some are globally active.

Class and Race

Picking a race and class also has an impact on how your character’s development works. Your race gives you a particular set of general passive skills, some of which can be more or less useful to certain builds. They are however fairly generic so don’t worry and simply pick whatever race you like to play!

Classes on the other hand have a bit more specific skill tree lines. Each class automatically has three skill lines unlocked which is the basic way to define your play style. Picking a class doesn’t define which skill line you have to pick, but you are limited by choices so pick a class wisely and make sure its playstyle suits you. I strongly suggest you take a look at our guides for classes which contain a list of skill lines and abilities, it should help you decide which class to pick!

Regardless of your class choice however you can also unlock new skills lines throughout the world by exploring or joining a guild. Joining a fighters or mages guild is fairly easy and the most simple way to unlock new skill lines. You can also choose to become either a vampire or a werewolf, giving your character a very specific skill set.

Veteran Ranks

Veteran RankVeteran Ranks (VR) are a system of advancement available at level 50. Once your character reaches the level cap he automatically gains VR1. Each veteran rank has a better tier of gear associated with it, making this essentially a gear progression. Progression in veteran ranks is further achieved by questing in higher difficulty Veteran dungeons, PvP combat and even crafting. Currently the highest Veteran Rank you can achieve is 10.

Progressing through VRs enables you to of course use better equipment, but it also increases your “overcharge” (look above under Attribute points) caps slightly. VR 1-5 is often referred to as “50+”, and VR5-10 as “50++” content.

Generic Skill Lines

Some skill lines such as Weapon, Armor or Tradeskill are available to all characters regardless of race or class. Even if you strayed a bit with your class choice and for example went with a spell caster or mage build, you can still become proficient in melee weapons by simply equipping and using them.

Considering you gain around 300 skill points in total, in endgame it’s very likely you will be experimenting and using many different skill lines. For leveling it’s best to focus on fewer skill trees and learn and morph abilities for added effects. If you intend to do any serious crafting, investing a few points into crafting skill trees is often a must.


In closing, The Elder Scrolls Online enables you to build your character exactly as you want to. When picking a race and class it’s best to already have a specific play style in mind, but the game encourages experimenting and there are a ton of combinations of builds, skill trees, spells and abilities you can choose from and discover yourself.

To learn more about race, class and other choices you can make with your character check out Killerguides TESO Strategy Guide: it contains plenty of tips, tricks and premade builds to ensure you progress and level in the game in record time.

Posted in Game Info, Guides | Tagged , , , , , , , , , , | Leave a comment

The Elder Scrolls Online Release Date: April 4

Queen Ayrenn WallpaperEver since Bethesda announced the making of The Elder Scrolls Online thousands of fans have been waiting in anticipation of the release date. Just recently the developers sent a wave of beta invites to many players, and rarely anyone thought it might herald such an early release.

Today, Bethesda announced TESO will be officially released for PC platform on April 4th, 2014. It’s only five months away and during that time they will surely polish the game further. In April only PC players will be able to explore Tamriel, while PS4 and Xbox One gamers will have to wait until June to join the adventures. It’s not all bad news for console players though, as we can assume the additional time will enable the developers to work further on providing a good player experience.

Aside from Elder Scrolls Arena, ESO is the first game in the franchise that will enable players to explore the entire land of Tamriel, and promises the above standard single player experience Elder Scrolls fans are accustomed to. In addition to the news about launch date Bethesda and ZeniMax also released a new announcement trailer entitled War in Cyrodiil which puts this MMORPG’s PvP system in the spotlight.

The massive player versus player system in Elder Scrolls Online enables hundreds of players to fight together on the same battlefield, and the in game footage showcases a castle siege as well as some potential combat skills and weapons.

Five more months. Mark your calendars!

Posted in News, Videos | Tagged , , , , , | Leave a comment